Calibrating your monitor for digital imaging
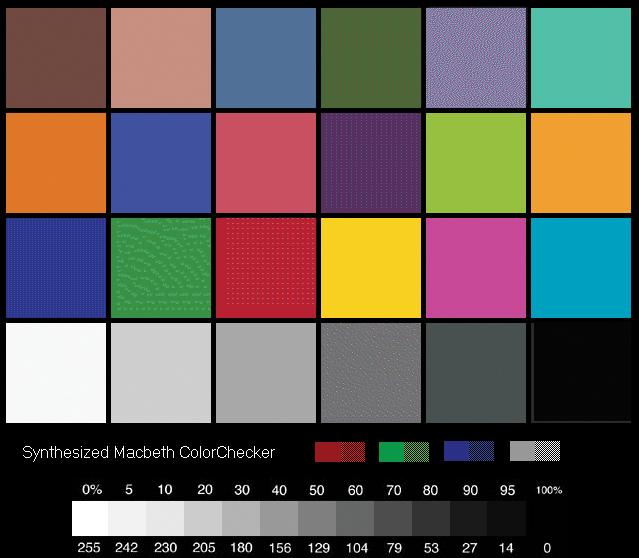
We calibrate our monitors at the (fairly well accepted) PC normal gamma 2.2, this means that on our monitors we can make out the difference between all of the (computer generated) grayscale blocks below. We recommend to make the most of this review you should be able to see the difference (at least) between X,Y and Z and ideally A,B and C. ![]() Also find here a Macbeth color chart to calibrate your monitor. Open it with explorer, adjust your monitor’s color settings from the buttons on the monitor. Once this is done open Photoshop and run their color calibration utility. Once this is done create and save an ICC profile. Your monitor is now calibrated. Monitors rarely come calibrated from the factory. If you open this chart on your desktop and you don’t see any color cast across the whites, grey or the blacks and you can see thirteen distinct grades from 0 to 100% then leave your monitor alone it is close enough. However, if you see for example a magenta cast in the blacks or a red or pinkish cast in the middle grey then you have a problem which need to be corrected before you start photoshopping. If from 70% to 100% is one solid black bar you have a density problem which needs to be corrected. If your guys are working on Mac remember that the Mac’s default gamma setting is 1.8 and Window’s is 2.2 you will need to adjust this before making any changes to the monitor.
Also find here a Macbeth color chart to calibrate your monitor. Open it with explorer, adjust your monitor’s color settings from the buttons on the monitor. Once this is done open Photoshop and run their color calibration utility. Once this is done create and save an ICC profile. Your monitor is now calibrated. Monitors rarely come calibrated from the factory. If you open this chart on your desktop and you don’t see any color cast across the whites, grey or the blacks and you can see thirteen distinct grades from 0 to 100% then leave your monitor alone it is close enough. However, if you see for example a magenta cast in the blacks or a red or pinkish cast in the middle grey then you have a problem which need to be corrected before you start photoshopping. If from 70% to 100% is one solid black bar you have a density problem which needs to be corrected. If your guys are working on Mac remember that the Mac’s default gamma setting is 1.8 and Window’s is 2.2 you will need to adjust this before making any changes to the monitor. 
